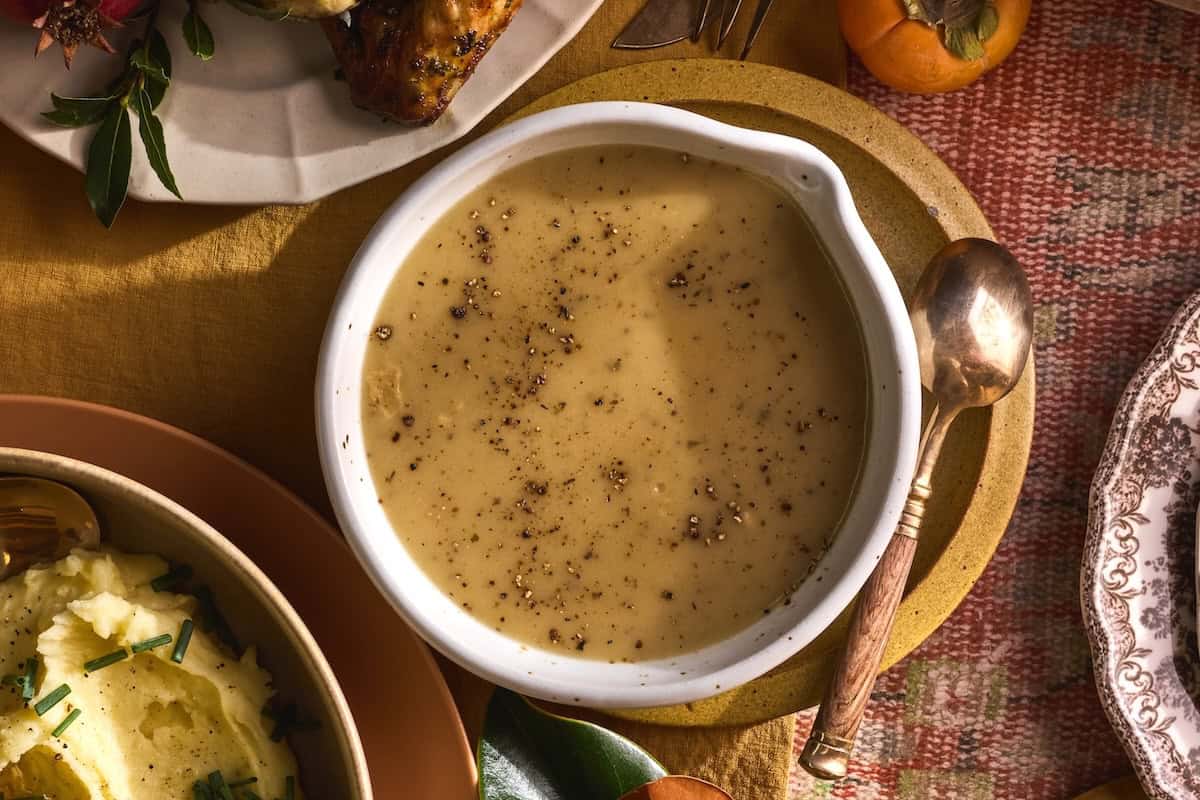
Crafting the Ultimate Turkey Gravy from Drippings: A Foolproof Guide
Thanksgiving and other festive meals simply aren't complete without a rich, savory turkey gravy. But often, the thought of making it from scratch can send even the most seasoned home cooks into a pre-dinner panic. Visions of clumpy, bland gravy or, worse, running out entirely, can be daunting. Yet, what if we told you that the secret to an absolutely spectacular gravy isn't found in a jar or an instant mix, but right there in your roasting pan?
Indeed, the most delicious, deeply flavored turkey gravy is born from the very drippings your turkey generously provides. It's a surprisingly straightforward process that not only elevates your holiday feast but also saves you money on those less-than-stellar store-bought alternatives. In this comprehensive guide, we'll walk you through transforming those humble drippings into a velvety, luscious gravy that will have your guests asking for seconds – and possibly the recipe!
The Unbeatable Flavor of Homemade Turkey Gravy
Why bother with homemade gravy when there are so many convenient options available? The answer lies in flavor, quality, and cost-effectiveness. Those grocery store jars and packets simply cannot replicate the complex, authentic taste that comes from using real turkey drippings and giblets. Your homemade gravy will be free from artificial flavors, excessive sodium, and unfamiliar ingredients, offering a pure, unadulterated taste that perfectly complements your roasted turkey.
The "makings" for outstanding gravy are literally a byproduct of your roasted bird. By utilizing the neck, heart, and gizzard to create a flavorful stock, and leveraging the rendered fat and browned bits (the "fond") from the roasting pan, you're building layers of savory goodness. This is the essence of a truly foolproof Thanksgiving gravy – an easy homemade turkey gravy from drippings that truly stands out.
Laying the Foundation: Crafting Your Flavorful Turkey Stock
The first critical step in achieving a truly exceptional turkey gravy is preparing a robust stock. This can be done a day ahead, easing your Thanksgiving Day workload significantly. Don't underestimate the power of these humble giblets!
- Gather Your Giblets: When you unwrap your turkey, you'll typically find a paper bag tucked inside the cavity. This contains the neck, heart, liver, and gizzard. Carefully remove these.
- Rinse and Select: Place the neck, heart, and gizzard into a two-quart saucepan and rinse them thoroughly under cold water. Important: Set aside the liver. While often included, boiled turkey liver can unfortunately impart a bitter, metallic taste to your stock, which we want to avoid for a smooth gravy.
- Simmer for Flavor: Pour one quart of good quality chicken broth over the giblets. If you forgot to buy chicken broth, plain water will suffice, though broth will add more depth. Bring the liquid to a gentle simmer over medium to low heat.
- Cook Until Tender: Giblets are tough and require time to soften and release their flavors. Let them simmer for approximately two hours. Keep an eye on the liquid level; if it starts to evaporate too much, add a little more water to keep the giblets submerged. The stock is ready when the meat from the neck pulls off easily.
- Cool and Strain: Once cooked, remove the saucepan from the heat and let the stock cool slightly. Carefully remove the giblets from the pan. At this point, you have options: you can finely chop the neck meat and gizzard to add texture to your finished gravy, or you can reward your patiently waiting pet with a delicious, cooked treat (ensure no bones are given to pets).
- Store or Proceed: If making ahead, strain the stock through a fine-mesh sieve into a clean container, let it cool completely, then refrigerate until needed.
Preparing Your Turkey for Optimal Drippings
While the giblet stock is crucial, the stars of the gravy show are undeniably the turkey drippings. To maximize these, consider a few simple steps when preparing your turkey:
- Dry Brine for Flavor and Skin: A day before roasting, wipe your turkey dry with paper towels, both inside and out. Salt it generously, then place it uncovered in the refrigerator overnight. This dry brining not only seasons the meat deeply but also helps achieve wonderfully crispy skin, which in turn contributes to richer drippings.
- Roast on a Rack: Always roast your turkey on a rack set inside your roasting pan. This elevates the turkey, allowing air to circulate for even cooking and, crucially, allowing all those flavorful juices and fat to collect neatly at the bottom of the pan, forming the perfect foundation for your gravy.
- Rest Your Turkey: Once the turkey is cooked, remove it from the roasting pan to a platter and cover it loosely with foil. Let it rest for at least 20-30 minutes, or even longer. This resting period allows the juices to redistribute within the meat, making for a more tender turkey, and also gives the drippings in the pan time to settle.
The Art of the Roux: Transforming Drippings into Gold
With your stock ready and your turkey resting, it's time for the magic to happen – creating the roux and building the gravy's body. This is where your turkey drippings truly shine.
Step One: Separating Fat and Capturing Fond
Carefully pour all the contents from your roasting pan into a heatproof bowl or a large glass measuring cup that has been lined with a fine-mesh sieve. This will catch any large bits of turkey or herbs. Allow the drippings to sit for a few minutes; the fat will separate and rise to the top.
- Measure the Fat: Skim off the clear, rendered turkey fat from the top. Measure out exactly half a cup of this pure turkey fat into a two-quart saucepan. This precision is key for a perfectly textured gravy. If you don't have enough turkey fat, simply make up the difference with melted unsalted butter until you reach the exact half-cup measurement.
- Deglaze the Pan (The Fond): The brownish, caramelized bits stuck to the bottom of your roasting pan are called "fond" – and they are packed with incredible flavor. Add about a cup of boiling water to the empty roasting pan. Place the pan over two burners on medium heat (if it's stovetop safe) or simply stir vigorously, scraping up all those delicious brown bits with a wooden spoon. Pour this flavorful liquid into the bowl with your remaining drippings (the non-fat juices). Skim off any additional oil that might have risen to the surface and discard it. This deglazed liquid will add immense depth to your gravy.
Step Two: Creating the Golden Roux
Now, with your half-cup of pure turkey fat heating gently in the saucepan, it's time to build your roux.
- Add the Flour: Measure out exactly half a cup of all-purpose flour and add it to the melted turkey fat in the saucepan.
- Cook the Roux: Over medium heat, stir constantly with a whisk or a wooden spoon. The flour will absorb the fat and form a paste. Continue stirring for several minutes until the roux takes on a beautiful, golden-brown color and has a nutty aroma. This cooking process is crucial; it cooks out the raw flour taste and develops a richer flavor for your gravy.
Bringing It All Together: Finishing Your Perfect Gravy
The final stage is where your gravy transforms from a thick paste into a luxurious, pourable sauce.
- Slowly Add Stock: Gradually add the quart of prepared turkey giblet stock to the roux in the saucepan, whisking constantly to prevent lumps. Start with a small amount to create a smooth slurry, then slowly pour in the rest.
- Simmer and Thicken: Bring the gravy mixture to a boil over medium-high heat, continuing to stir. As it heats, it will begin to thicken. Reduce the heat to a simmer and let it cook for a few minutes, allowing it to reach your desired consistency.
- Incorporate Drippings for Depth: This is where you add another layer of flavor. Slowly add as much of your defatted turkey drippings (the deglazed fond liquid you collected earlier) into the gravy as you like, tasting as you stir. These drippings pack a concentrated turkey flavor that will make your gravy truly spectacular.
- Season to Perfection: Taste your gravy. It will likely need salt and freshly ground black pepper. Adjust seasonings to your preference. Consider a tiny pinch of sage or a dash of sherry for extra complexity, but generally, the turkey drippings provide all the flavor you need.
If you're looking for different approaches or quick fixes, our turkey gravy - Article 3 article has you covered with alternative methods and creative twists.
Troubleshooting and Expert Tips for Turkey Gravy Success
Even with the most meticulous steps, sometimes gravy can throw a curveball. Here are some solutions and extra tips:
- Gravy Too Thin? Simmer it gently for a longer period to allow it to reduce and thicken naturally. If you're short on time, create a quick slurry by mixing a tablespoon of cornstarch with an equal amount of cold water, then whisk it into the simmering gravy. Cook for another minute until thickened.
- Gravy Too Thick? Simply whisk in a little more turkey stock, chicken broth, or even hot water until it reaches your desired consistency.
- Lumpy Gravy? Vigorously whisk the gravy over heat. If lumps persist, you can pass the finished gravy through a fine-mesh sieve for a silky-smooth texture.
- Not Enough Drippings? No problem! Use butter for the fat in your roux, and rely more heavily on your giblet stock (or store-bought chicken/turkey broth) for the liquid. You can also boost flavor with a splash of white wine, a dash of Worcestershire sauce, or a crumbled bouillon cube dissolved in hot water.
- Make Ahead Option: The giblet stock can be made a day or two in advance. You can also make the entire gravy ahead of time. Reheat gently over low heat, whisking constantly, and add a splash of water or broth if it's too thick.
- Herb Infusion: For an aromatic twist, add a sprig of fresh thyme or rosemary to your giblet stock as it simmers, or even to the gravy during the final stages of thickening.
For more ideas on variations or troubleshooting, check out our guide on turkey gravy - Article 1.
Making homemade turkey gravy from drippings is not just a cooking task; it's an act of culinary magic that transforms simple pan juices into a magnificent sauce. It truly is the easiest way to turn roast turkey drippings into a perfect gravy. By following these steps, you'll demystify the process and confidently present a rich, flavorful, and perfectly smooth gravy that tastes like pure holiday joy. No more panic, just pure pleasure in a saucepan. Enjoy the satisfaction of knowing you created this delicious centerpiece from scratch, enhancing your holiday feast with an unparalleled depth of flavor!
